RSS Feed

Three Bean Salads

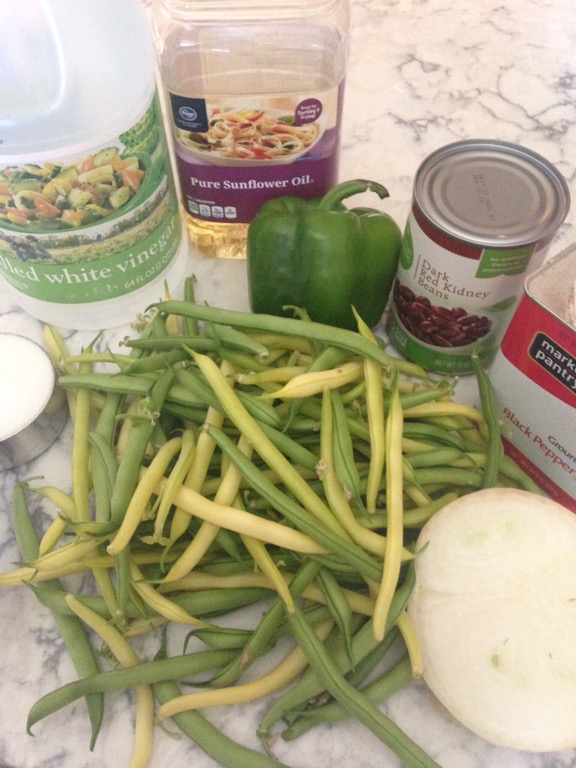
This cold marinated salad became popular in the 1960’s and was commonly served at picnics, BBQs and as a side salad. I’ve adapted the original recipe by using fresh rather than canned green beans and yellow wax beans. I’ve also cut the sugar way back and used no added salt canned kidney beans and garbanzo beans.
Here is the green, yellow and kidney bean salad.

This is another version made with sugar snap peas, dark red kidney beans and garbanzo beans! Everything else is the same as the above 3 bean salad.

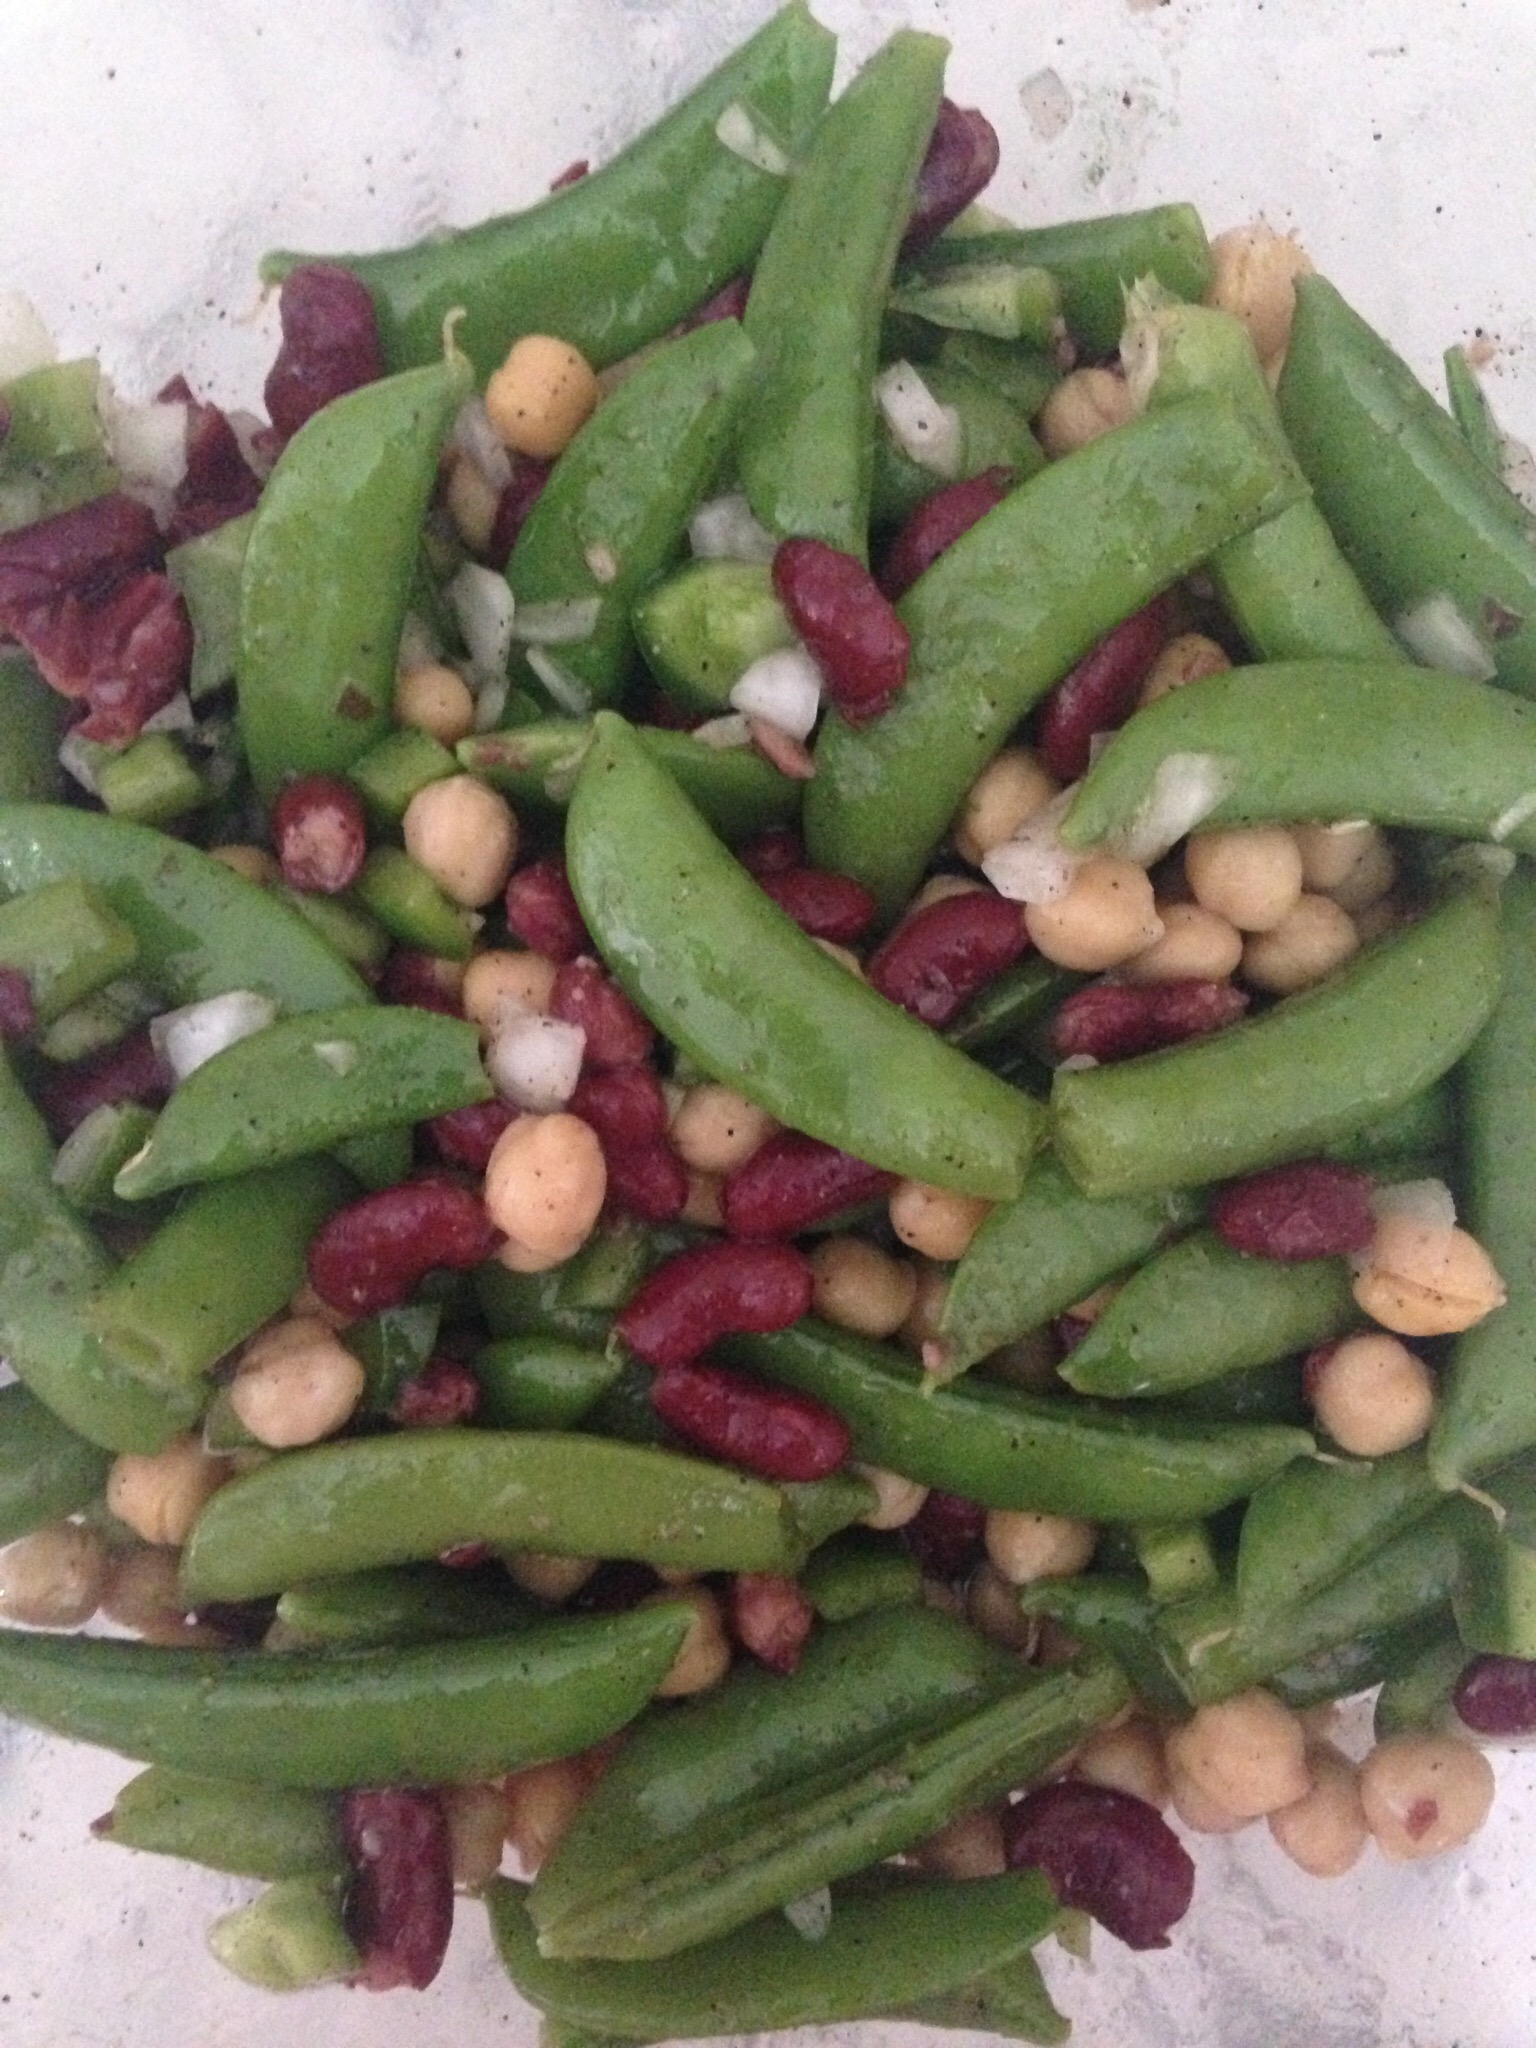
Snap peas are peas with an edible pod. The pod and peas are very tender and sweet and easier to prepare than peas. All you have to do is break off the stem end and in one continuous motion, tear off the string from one side of the pod. Voila!


Beans are trimmed and cut in thirds

Beans have been blanched for a minute and then rinsed with cold water and tossed with ice

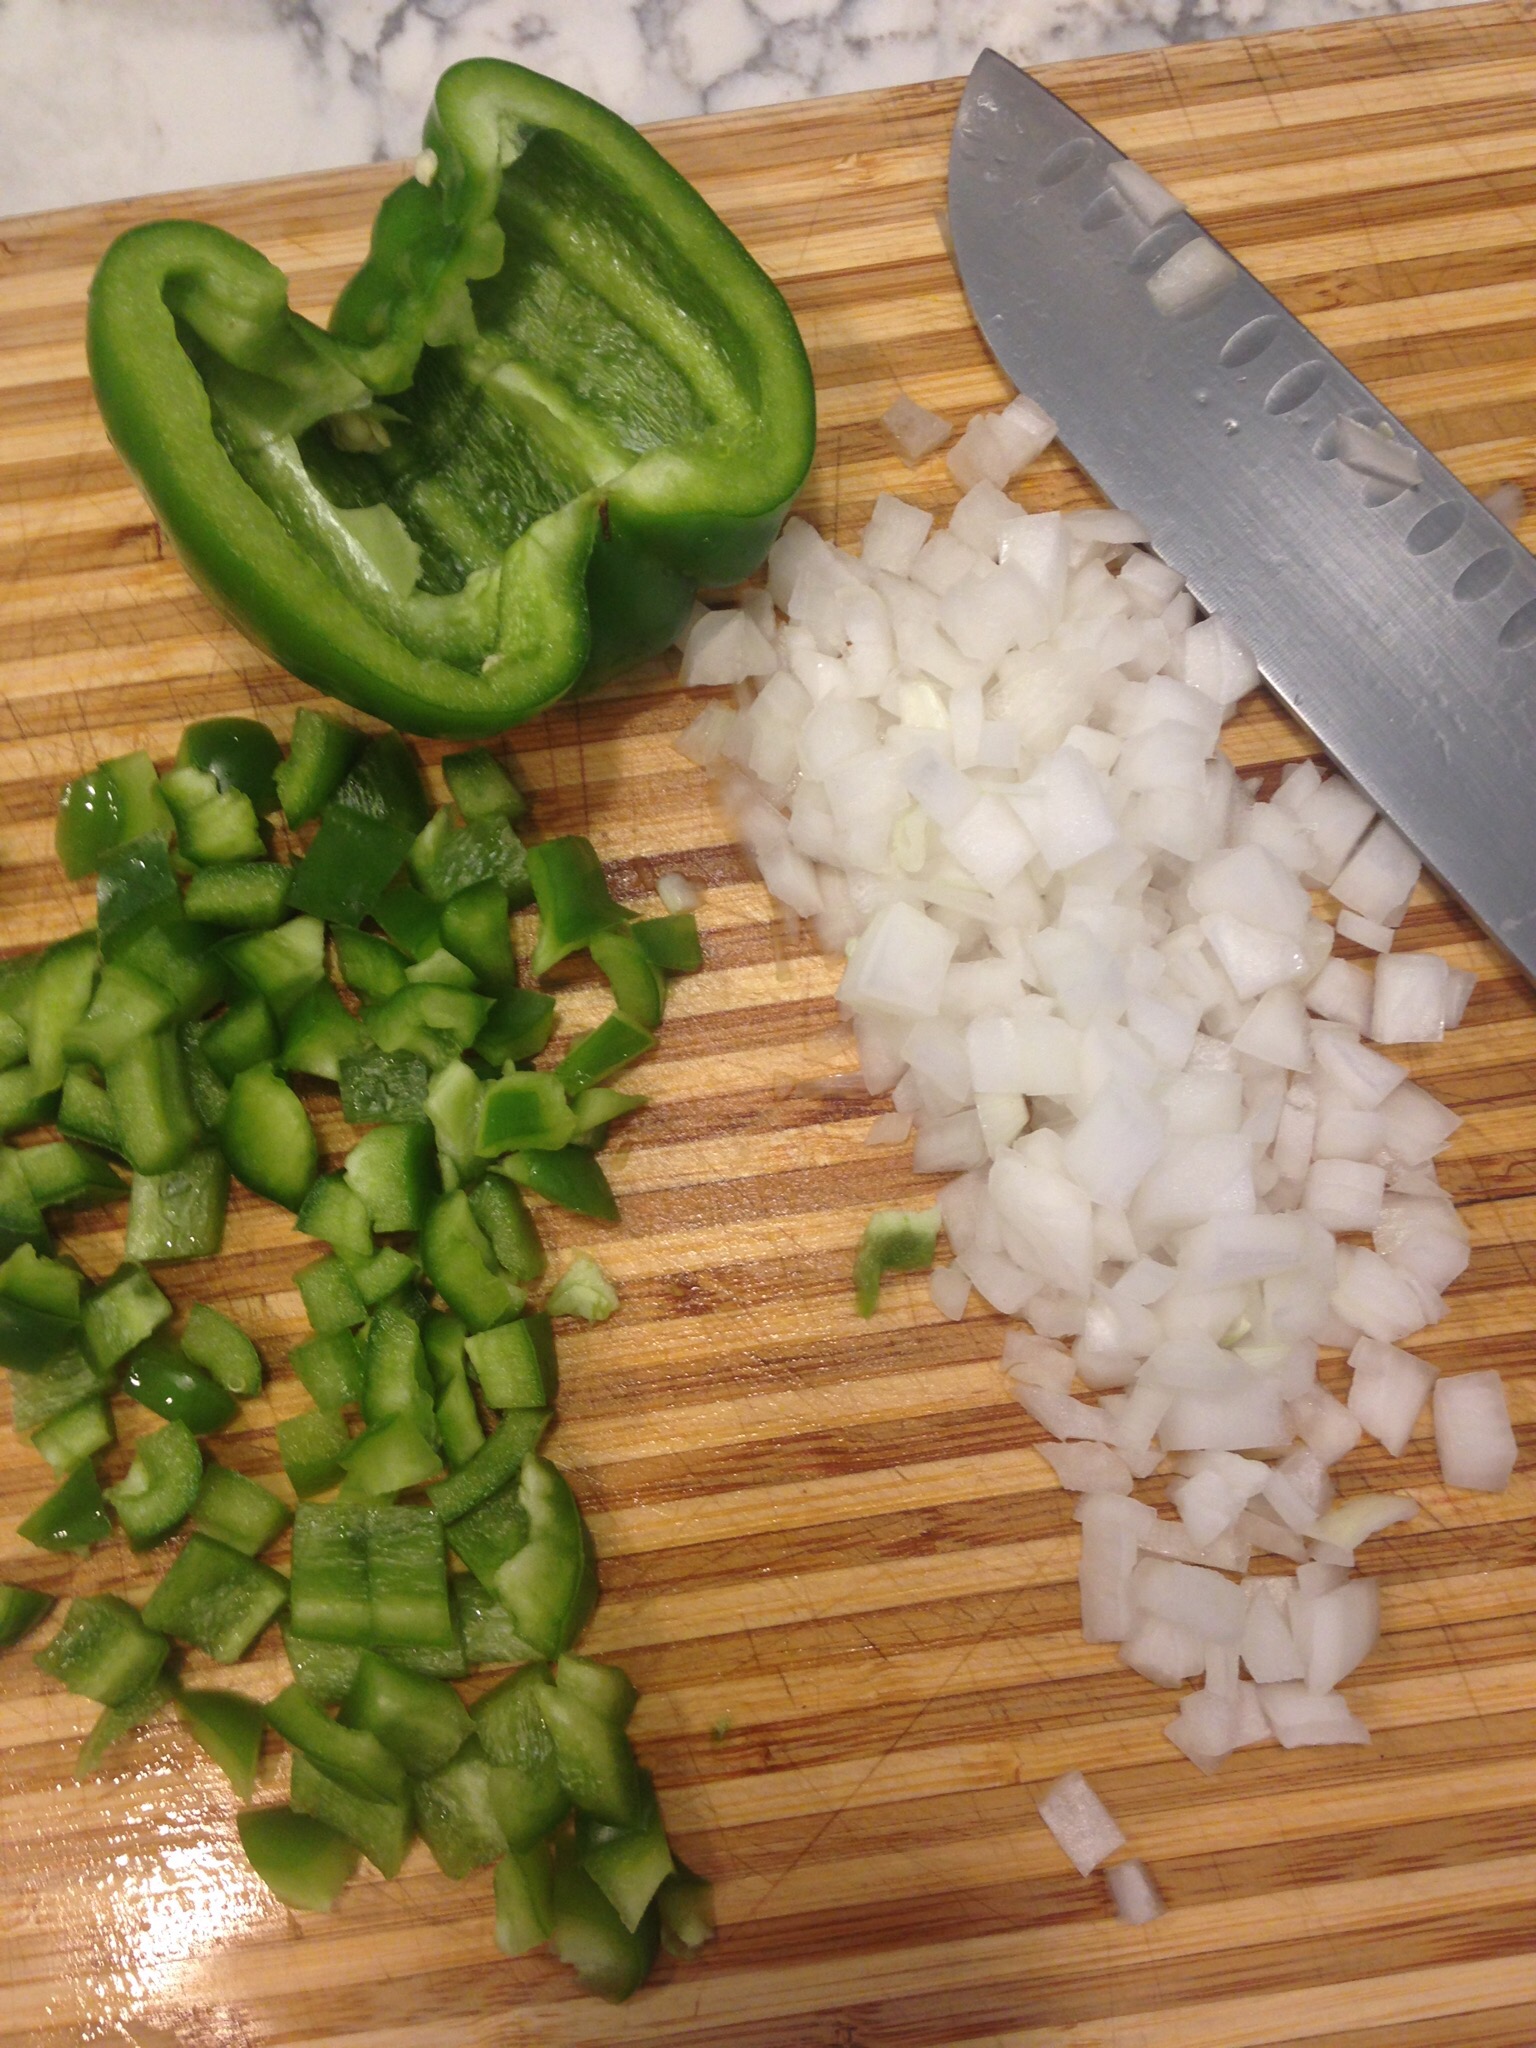
Diced green pepper and onion 


Recipe:

5 cups yellow and wax beans, approximately, trimmed, cut in thirds and blanched for 1 minute and quickly cooled

1- 15 oz can dark red kidney beans, rinsed and drained

1/2 green pepper, diced

1/2 cup onion, diced

  • Marinade: Whisk together in a large bowl:

1/3 cup sunflower oil or other vegetable oil, not olive oil

1/3 cup white vinegar

1 teaspoon salt

1 teaspoon black pepper

1 tablespoon sugar

  • Add the prepared vegetables to the marinade.
  • Mix well.
  • Pour into a container with a tight fitting lid.
  • Refrigerate overnight.
  • Invert the container a few times every so often to distribute the marinade.

The other recipe is made the same, except instead of the green and yellow beans, use:

3 cups sugar snap peas, approximately, strings removed and blanched 1 minute and quickly cooled

1-15 ounce can garbanzo beans

Mrs. Field’s Chocolate Chip Cookies

These cookies are said to be the secret recipe of the Mrs. Field’s Cookie Company. My friend Lisa Williams gave the recipe to me in 1988. It’s been our favorite chocolate chip cookie ever since! I’ve added a bit more salt and I usually omit the walnuts. My cookies are also smaller than Mrs. Field’s huge 4 inch cookies. I make 7 dozen cookies from this recipe.

All my ingredients, ready to go!

  • Preheat oven to 350 degrees F
  • In a mixer cream together:

1/2 pound softened butter

3/4 cup sugar

1 cup brown sugar, lightly packed 

  • Add:

2 large eggs

3/4 teaspoon vanilla

  • In a medium size bowl whisk together:

3 cups flour

3/4 teaspoon baking soda

3/4 to 1 teaspoon salt

  • Add flour mix to the butter mixture.
  • Mix only just until barely combined. Don’t beat the dough or the cookies won’t be tender.
  • Add and mix only a few seconds:

12 oz chocolate chips or chocolate chunks (I prefer Ghirardelli bittersweet chocolate)

1 cup chopped walnuts, optional

  • Drop by a teaspoon on a baking sheet with at least 2 inches apart.

  • Bake at 350 degrees F for 8-9 minutes. Don’t over bake! They will crisp up when cooling.
  • Remove from oven and let cool slightly.
  • Remove from baking sheet when slightly cooled, after about 4 minutes, and place on cooling racks until crisp and firm.


Enjoy!

Paella on the Grill

Last night Dave made his best paella yet! This is a Cook’s Illustrated recipe for Paella on the Grill, found in the July/August 2016 issue or online at CooksIllustrated.com.

Here is the link to the recipe. You may need a subscription to open it.

https://www.cooksillustrated.com/recipes/8890-paella-on-the-grill?incode=MCSCM00L0&ref=new_search_experience_2

Paella is a Spanish rice dish with many variations. We enjoyed paella in Albufera, a town near Valencia in southern Spain. They are known for growing rice and making their paella with a dry caramelized crust of rice that is the most prized part of the dish!  It’s called the socarrat.

Traditional paella is made on the grill which provides a large cooking surface to develop the socarrat and a charcoal heat that gives the smokey flavor. The amount of shrimp, chicken and chorizo you see here is more generous than the traditional Valencia style. It’s all about the rice!

Notice the paella pan is thin, has impressions hammered on the bottom and is not covered with a non-stick surface.


We use a 17 inch traditional paella pan you can buy online or at our local Eastmans Party Store in Midland Michigan. It does NOT have a Teflon-like coating. We coat it with oil after using to prevent rusting.

We use a Weber charcoal grill with a gas starter. 

This is a great recipe to serve for family and friends!

https://www.cooksillustrated.com/recipes/8890-paella-on-the-grill?incode=MCSCM00L0&ref=new_search_experience_2

Sweet Yeast Bread

My grandmother was from Belarus, part of the former Soviet Union. This is her recipe for sweet yeast bread.

My Russian and Ukrainian friends are familiar with this style bread. There is a special tall, cylindrical baking pan they use for Easter, but we use empty vegetable cans for small loaves or larger coffee cans. The shape looks like a mushroom or a dome of the Russian Orthodox Churche. But my Grandma for everyday baking used traditional glass bread pans and she made this year round, not only at Easter.


1 cup milk

1/4 pound butter

4 and 1/2 cups flour, sifted

1 cup sugar

4 large eggs

1 teaspoon salt

1 tablespoon dry yeast

2 teaspoons sugar

1/3 cup warm water

1/2 cup raisins, optional

  • In a saucepan heat milk. Add butter and melt. Keep warm.
  • In a large bowl beat eggs with a whisk till lemon color. Add sugar slowly and continue beating until thick and light
  • In a very large bowl combine flour and salt.
  • Add warm milk mix to eggs.
  • Add egg mix to flour and beat with the back of a wooden spoon against the front side of the bowl. Turn the bowl 180 degrees frequently.Or beat with the paddle of a mixer.

  • Combine 2 teaspoons sugar and 1/3 cup water. Dissolve and mix in yeast. Cover with a towel and allow to rise to double in volume.
  • Add yeast to dough and continue beating until smooth and glossy.
  • Pour dough into a buttered large bowl. Cover with plastic wrap, a rubber band and a towel. Rise until doubled.


  • After risen once, cut through the dough with a spatula.
  • Add raisins.
  • Pour into 3 buttered and floured cans. Fill to only 1/2 full.

  • Rise till dough reaches the top of the can.
  • Bake at 350 degrees F for 35-40 minutes.
  • You can drizzle with a thin icing if you like.

Rhubarb Jam with Cayenne & Strawberry Jam

I have two recipes on this post. Rhubarb Jam and Strawberry Jam. You can find the Strawberry Jam recipe after the Rhubarb Jam.  The key to both recipes is to use a candy thermometer to measure the temperature of the Jam. Once it reaches 210 -218 degrees F the sugar will break down and cause the Jam to set and become thickened enough to be considered Jam. 

It’s a soft set Jam. Not a Jello like thick Jam you purchase at the grocery store. This soft set works as a topping over ice cream and cakes too!

Rhubarb comes in many varieties. My neighbor Ruth Clark has “strawberry rhubarb” plants which have more red color towards the interior of the stalks of rhubarb. Plus the strawberry variety retains its red color. Isn’t it pretty?


Here I spread my rhubarb jam on buttered toast and sprinkled it with flaked sea salt. I served it with a fried egg. The egg yolk was broken and melted with cheddar cheese. Then I sprinkled it with smoked paprika and flaked sea salt.


I’ve made many different jam recipes. Now I always use a candy thermometer! I cooked the jam to 210 degrees F. It turns out perfect every time! It took about 30 minutes of cooking.


4 pounds trimmed rhubarb, cut in small pieces

4 cups sugar

1 lemon, cut in half, and juiced and include the seeds which have lots of pectin to thicken the jam!

1 and 1/2 cups water

1/8 teaspoon or so cayenne pepper is optional. Combine it with the water for easy mixing if you want.

  • In a large bowl combine the rhubarb, sugar, lemon halves, juice and seeds, and water. Let sit 1 hour at room temperature 

  • Pour this colorful mix into a large cooking pot and bring it to a boil over medium high heat. Stir almost constantly to prevent sticking. Add the cayenne if you like a little kick!
  • After 15 minutes lower to a slower boil at medium heat. Boil another 15 minutes and use a candy thermometer to measure the temperature. Stir frequently! When it reaches 210 F, remove from the heat. Check my video to see what a slower boil looks like.

Here is the rhubarb jam simmering:


Here is the strawberry jam simmering:


My method of canning is to use boiling hot jars, boiling hot utensils and then process the filled jars for 5 minutes. Here’s how I do it.

  • In a large pot of boiling water place your 8 – 8 ounce canning jars for at least 5 minutes. Keep them in the hot water until you are ready to fill them.
  • In a small pan of hot, but not boiling water place your 8 canning lids.
  • Use utensils that have been boiled at least 5 minutes
  •  Use a funnel to fill the jars
  • Wipe off any spilled jam from jars with a clean paper towel
  • Cover with hot lids
  • In a large pot of boiling water place a kitchen towel to cover the bottom and help keep jars stable
  • Place 6-8 jars in the pot, making sure water covers lids by 2 inches
  • Boil 5-10 minutes
  • Remove from boiling water and cool on your counters.

  • Voila! This takes a day to set and it won’t be as thick as your store bought jam. 😉
  • I adapted this recipe from Leitesculinaria.com.
  • I follow this same procedure for strawberry jam. Except I don’t add water or let the mix sit at room temp an hour before cooking. The quantities needed are:  

8-10 cups or 4 quarts strawberries, washed, dried, stemmed and crushed to measure 6 cups

6 cups sugar

1 lemon, halved, juiced, seeded with seeds included

Optional is to add about 1/4 teaspoon crushed red pepper or 1/8 teaspoon ground cayenne pepper for a kick!

Russian Orthodox Easter Eggs


My grandmother was Russian Orthodox and she was from Belarus. She made these types of colored Easter eggs with dried yellow onion skins. Her technique was to combine cooked eggs and onion skins in a large pot of water and then soak them for several hours.

I like to give the eggs a marble look and also at the same time cook the raw eggs with the yellow onion skins.

  • Wrap medium to large pieces of dried skins from yellow onions around each egg in varying degrees of cover to make patterns.
  • Secure skins by wrapping further with string. Don’t tie too tight.
  • Place eggs in a large pot in a single layer with not too much crowding.
  • Add water and cover the eggs by 2 inches.
  • Cover pot and bring to a boil.
  • Turn heat to the lowest possible level.
  • Cook 20 minutes.
  • Remove from heat and let the color absorb for 1 and 1/2 hours or so.
  • Drain, dry and voila!
  • A quicker technique is to not wrap the onion skins and only combine them in the pot.
  • As Grandma Korzin would say at Easter in Russian “He is Risen!”

Almond Milk and Frozen Cherry Smoothie

  
I’ve had fun making smoothies this month. NutsandBlueberries.com inspired me! Here is a favorite:

In a blender combine and blend till smooth:

3/4 cup almond milk

1/2 cup frozen sour cherries with no added sugar 

1 tablespoon ground flaxseeds

2 Medjool dates, pitted

Pour into a glass and top with fun things like:

Coconut shavings

Chia seeds

Matcha (powder fine ground green tea leaves)

There’s a lot of antioxidants, vitamins and minerals here, plus it’s low fat and low sugar! Drink up!

Beet Burgers with Corn Salsa and Red Cabbage Cole Slaw


Beet Burgers have a real meaty taste and look! I love them! The secret is roasting the beets!

Served here with Elote/Corn Salsa, you don’t need ketchup or mustard. I used fresh corn and Parmesan shavings in the salsa. For the cole slaw recipe I substituted red cabbage for the green.

I found these fantastic sites on Instagram!

Go to Chocolate for Basil.com   Look for Beet Burger with Elote Salsa

Here is the link:

http://chocolateforbasil.com/recipe/beet-burgers-with-elote-salsa/

 CravingsinAmsterdam has a recipe for Tamarind Roasted Chickpea Tacos with Apple & Cabbage Slaw. I used the slaw recipe and substituted red cabbage for the green.

Here is the link:

http://cravingsinamsterdam.com/?s=tamarind+roasted+chickpea+tacos&submit=Search


Stracotto, an Italian Beef Stew With Puréed Cauliflower, Mashed Potatoes or Pasta


Stracotto means OVER COOKED in Italian and is the reason this beef stew is so tender and succulent!  It is usually served with potatoes or pappardelle pasta, but the Italian beef and tomato sauce is paired here with Puréed Cauliflower! Fewer carbs and more veggies to get you to the goal of 4 cups of vegetables a day!

This recipe is adapted from The New Basics Cookbook by Julee Russo and Sheila Lukins. There are several steps, but so worthwhile!

Stracotto starts out by searing a whole beef pot roast. After it simmers in beef broth it’s removed from the pot and sliced into pieces.

Here’s what that looks like. I used red peppers instead of green this time:


This beef roast is sliced during the cooking and after simmering 3 hours is dished up with mashed potatoes and topped with the hearty Italian tomato sauce.

Shavings of hard cheese like Parmesan can be dropped on top.

Directions and Ingredients

  • Place a large saucepan or Dutch oven over high heat. 
  • Add 3 tablespoons olive oil and swirl around
  • Add a 3 and 1/2 pound beef chuck roast. 
  • Keep over medium high heat and brown on one side. Don’t touch or try to turn it until it’s deeply browned, about 10 minutes each side.


  • Once it’s crusty brown, 10 minutes, turn it over and brown the other side


  • After it’s browned, remove beef to a plate and set aside.
  • Add to the same saucepan:


4 cups chopped onion

2 cups chopped carrots

2 cups chopped celery

8 cloves garlic, slivered

  • Sauté until softened. 
  • Place the roast back in the saucepan over the vegetables
  • Pour over the roast:

2 cups beef stock

  • Bring to a boil, cover and simmer 1 1/2 hours.
  • Remove the roast and place on a cutting board
  • Trim off the fat and divide roast into 3 to 4 inch wide sections
  • Slice the sections across the grain into 1/4 inch slices


  • Return the slices to the saucepan.
  • Mix in the following:    

2-28 ounce cans diced tomatoes OR 1 can diced tomatoes and 1 can tomato sauce for a thicker sauce (If you like spice measure heaping teaspoons)

2 teaspoons minced garlic

1 teaspoon black pepper

1 teaspoon dried thyme

1 teaspoon dried oregano

1 tablespoon dried basil

1 teaspoon dried rubbed sage

2 sprigs fresh rosemary or 1 tablespoon dried

1/2 teaspoon dried red pepper flakes

5 dried bay leaves or dried Mirto leaves which I found in Corsica and Sicily

2 green peppers chopped

1 and 1/2 cups rich red wine, like Cab, Shiraz, Chianti, Pinot

  • Bring to a boil. Then cover and simmer 1 1/2 hours

  
At this point it’s ready to serve with the traditional penne or pappardelle style pasta or mashed potatoes. It’s super on its own too as a hearty soup!

I used Puréed Cauliflower here which is like a light mashed potato.

Puréed Cauliflower

  • Wash 1-2 large heads of cauliflower and cut into big chunks
  • Place in a medium saucepan with an inch of water. 
  • Bring to a boil, cover and then simmer till tender, about 10 minutes
  • Drain the cauliflower and purée with an emersion or stick blender.

The Pureed Cauliflower using 1 head of cauliflower serves 4-6. The Stracotto serves closer to 12. If you are serving a crowd, use 2 heads of cauliflower. The Stracotto is so involved, I like to make this big recipe and freeze the leftovers or serve to guests at a dinner party. Perfect comfort food for cold winter nights

Voila!

Flash Baked Salmon

  
Super quick and yummy! Cooks Illustrated is my source 😉

  • Heat your oven to 500 degrees.
  • Cover a rimmed baking sheet with foil and place it on middle rack of oven as it’s heating up.


  • I used Sockeye Salmon with the skin, and cut a 1 and 1/3 pound filet into 4 pieces Norwegian salmon is also a favorite of mine
  • Pat dry with paper towel


  • Rub all sides with olive oil
  • Sprinkle with salt
  • LOWER OVEN TEMPERATURE TO 275 degrees!!!!!


  • Place the salmon skin side down on the hot baking sheet
  • Bake 4-6 minutes or until internal temperature reaches 125 degrees, or to your preference. Be sure to check internal temperature after 4 minutes. Baking time depends on thickness of the fish


  • Voila! Serve at once!